


How do I archive a classroom or learner?
Archive and restore classrooms or learners without losing their data or history.
For: Admins and Instructors
Archiving hides a classroom or learner from your active dashboard views without deleting their data or history. Use it at the end of a term, when a learner leaves, or any time you want to declutter your roster without losing records.
If your organization rosters through Clever or ClassLink, read the callout near the bottom before you start. The archive behavior may differ for you, and that's expected.
Archive a classroom
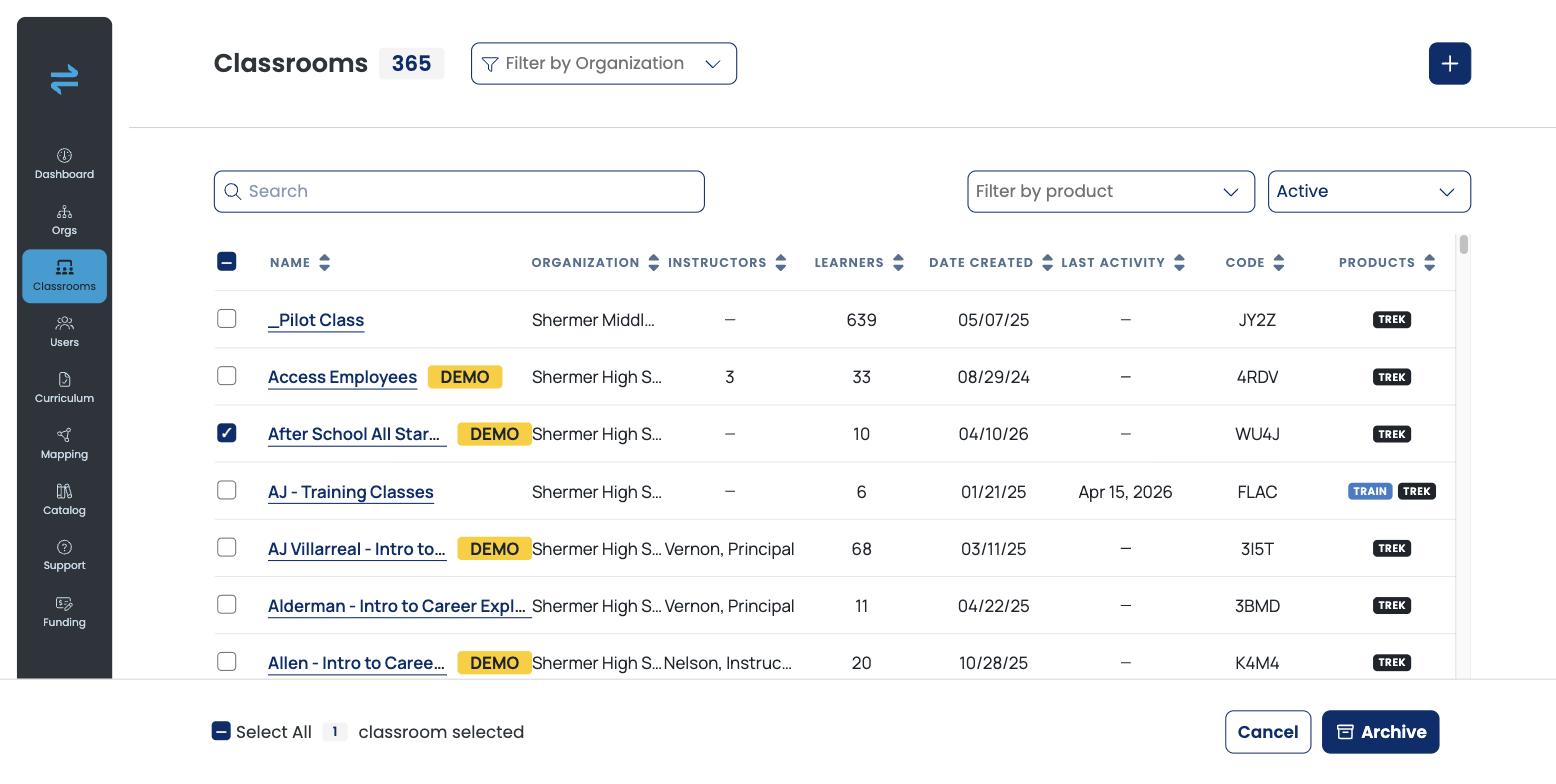
In the left sidebar, select Classrooms. Confirm the status filter (top-right of the list) is set to Active.
Select the checkbox to the left of the classroom (or classrooms) you want to archive. A bar appears at the bottom reading “[N] classroom selected,” with Cancel and Archive buttons.
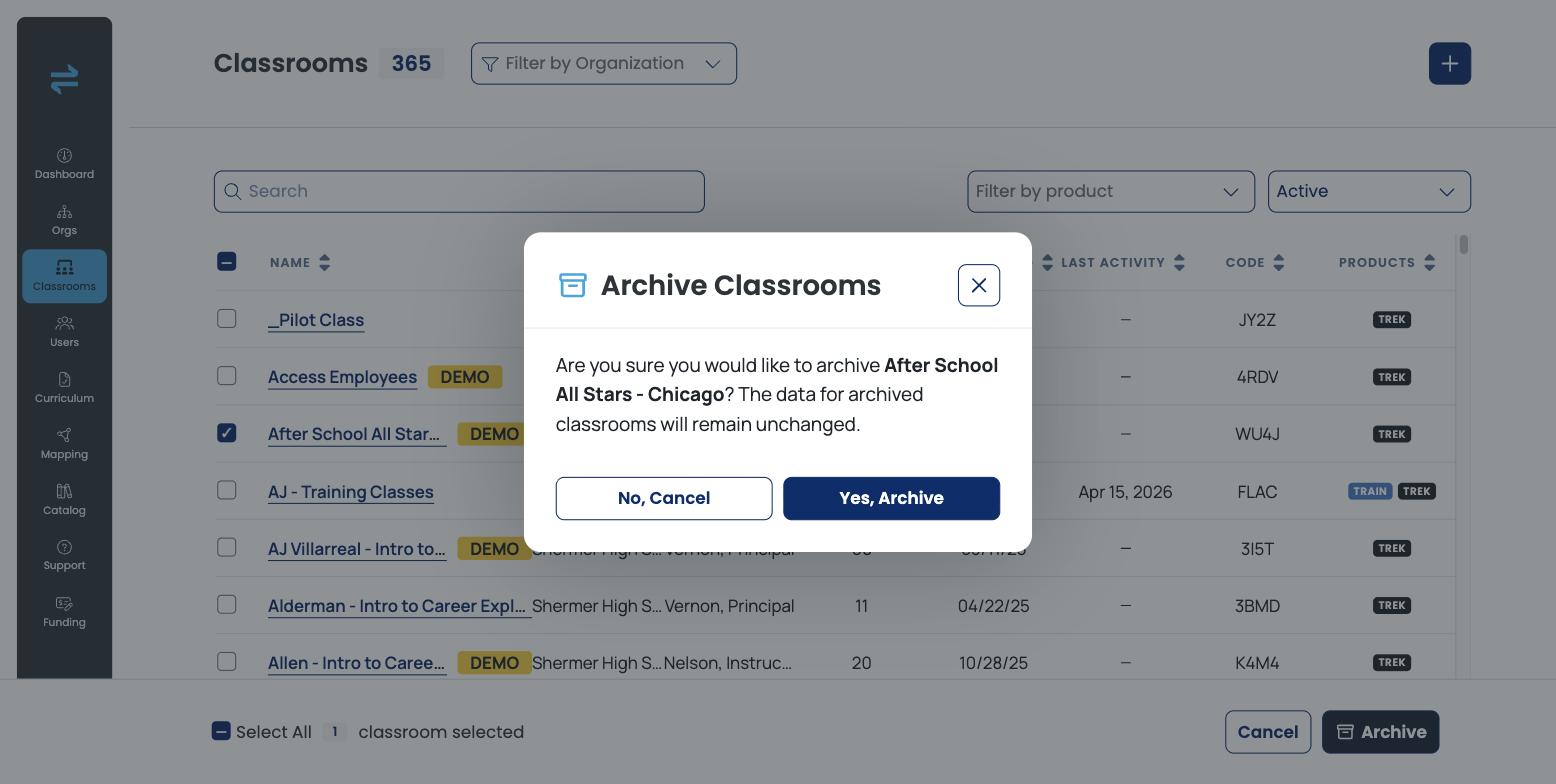
Select Archive. A confirmation dialog titled Archive Classrooms appears: “Are you sure you would like to archive [Classroom Name]? The data for archived classrooms will remain unchanged.”
Select Yes, Archive to confirm, or No, Cancel to back out.
The classroom no longer appears in your Active Classrooms list.
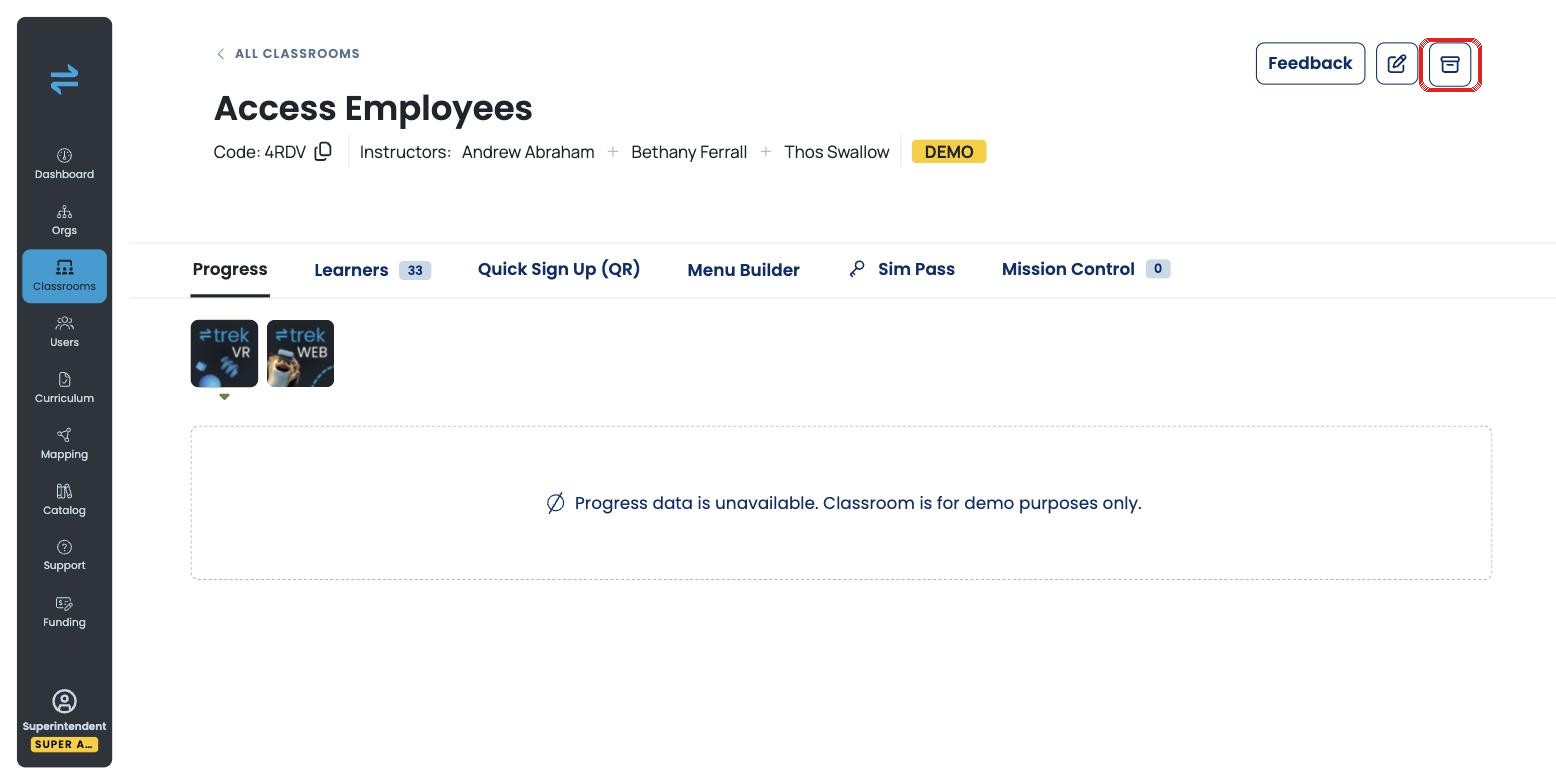
Tip: From a single classroom's detail page, you can also select the archive icon (a box icon, next to the pencil/edit icon in the top-right) to archive that classroom directly.
What happens to the classroom's data
Archiving doesn't delete anything. Learner progress, sim history, and reports tied to that classroom stay intact — you just won't see the classroom in your everyday view.
Archive a learner
In the left sidebar, select Users, then the Learners tab.
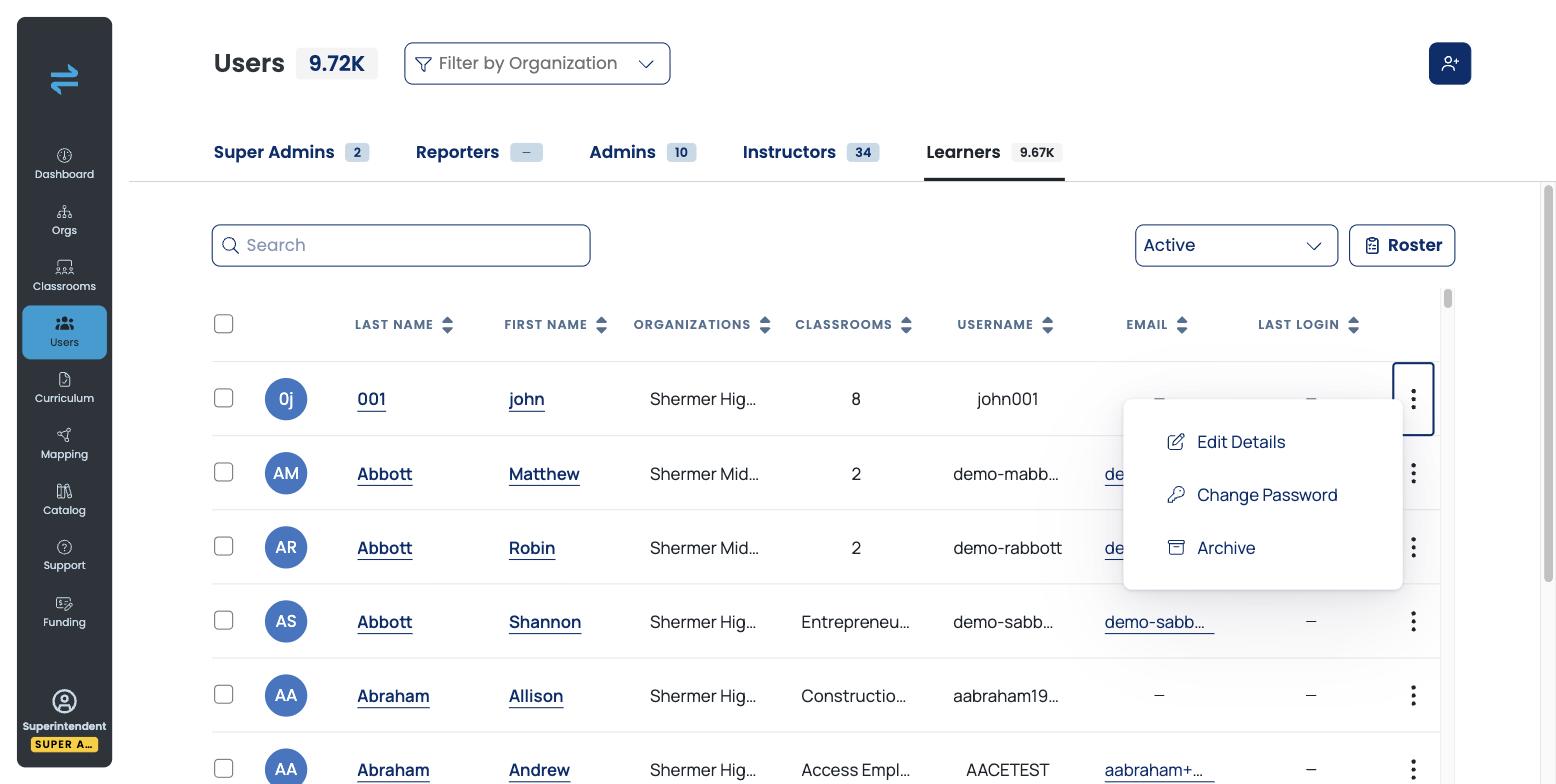
Find the learner's row and select the three-dot (⋮) menu.
Select Archive from the menu. (The same menu also has Edit Details and Change Password.)
The learner no longer appears in the Active list on the Learners tab.
To archive multiple learners at once, select the checkboxes next to their rows — a bottom bar appears with Cancel and Archive, the same pattern as bulk-archiving classrooms.
Note: In Transfr, “removing” a learner means archiving them — there's no separate hard-delete option in the row menu. Permanent deletion is only available from the Archived view (see below).
Find and restore archived classrooms or learners
On the Classrooms list or the Users > Learners tab, set the status filter to Archived (or All). Archived classrooms display a grey ARCHIVED badge.
Select the checkbox next to the classroom or learner you want to restore. The bottom bar now shows Cancel, Unarchive, and Delete.
Select Unarchive to restore it to the active list.
The classroom or learner reappears in the Active list, in the state it was in when archived.
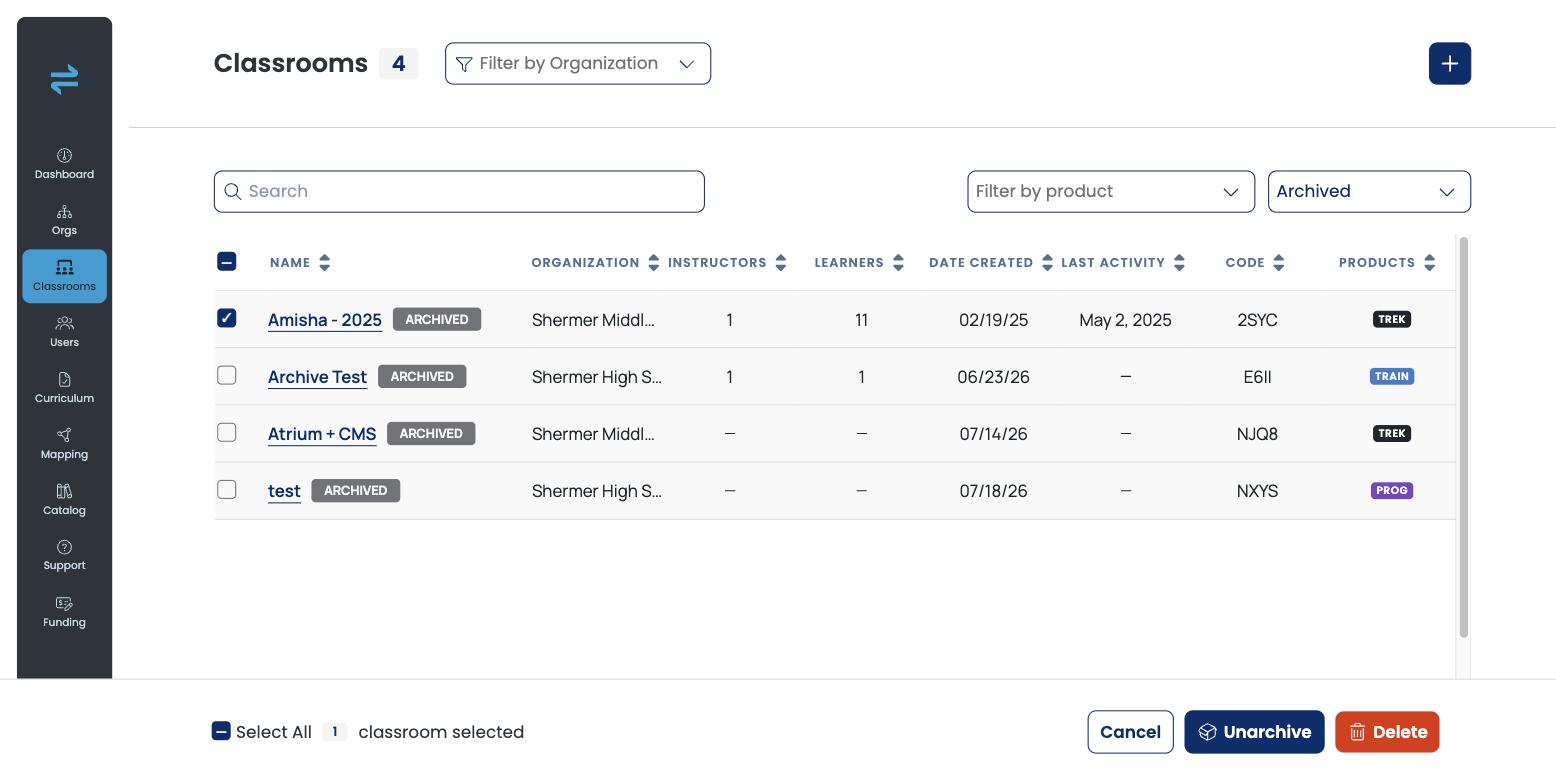
Caution: Delete in the Archived view permanently removes the classroom or learner — this cannot be undone. Use Unarchive instead unless you're certain.
For Clever and ClassLink Rostering Organizations
Note: If your organization syncs classrooms and learners through Clever or ClassLink, the archive experience above may not apply as-is.
For rostered organizations, your student information system (SIS) is generally the source of truth. Archiving is typically driven by the roster sync rather than by actions on the Transfr dashboard.
What to do instead: Archive or remove the classroom or learner in your SIS (Clever or ClassLink), then wait for the next sync. The change carries over to the Transfr dashboard automatically.
If a learner or classroom still shows as active on the dashboard well after you've updated your SIS, contact our support team.
Related articles
Still need help?
Last updated: July 24, 2026
