


How do I cast a headset to a browser?
Cast a Quest or Pico headset to a browser or Fire TV (Pico only), plus audio, locked-down networks, and fixes.
For: Instructors and IT Admins
Casting mirrors what a learner sees in the headset onto a browser window, so the rest of the class or a remote observer can follow along. This guide covers every casting method Transfr supports, how to cast when your network is locked down, and what to do when a cast is slow or glitchy.
Overview
Casting sends a live copy of the headset’s display to another screen. You don’t need it to run a sim — learners see everything they need inside the headset — but it’s the difference between watching one learner work and teaching a whole class.
Use casting when you want to:
- Demo a sim to the class before handing out headsets.
- Watch a learner’s screen in real time to spot confusion or a stuck step.
- Show a sim during a parent night, board presentation, or training session.
- Computer browser via ManageXR (Quest) — the main method for Quest headsets. Which method you use depends on the headset’s Meta OS version, and the wired option also works on locked-down networks.
- Meta Horizon casting (Quest) — for headsets enrolled in Meta Horizon Managed Services (MHMS).
- Browser or Amazon Fire TV (Pico Neo 3) — best for Pico classrooms.
Note: The Quest steps below apply to Meta Quest 2 and Quest 3S. Browser (ManageXR) casting is not available on older legacy Quest devices — contact our support team if that is what you have.
Cast a Quest headset to a computer (browser)
The ManageXR screencasting web app mirrors the headset to a browser window on your computer — useful for a quick check on a laptop, or when you need to record or share a screen over a video call.
Want it on a classroom TV? Once the cast is running in the browser, connect that computer to the TV with an HDMI cable. That works with any of the browser methods on this page. A Pico Neo 3 can also cast straight to an Amazon Fire TV — see Cast a Pico Neo 3.
Start by checking the headset’s Meta OS version, because it decides which method you follow. Our Technical Support team can tell you which firmware is on headsets leased from Transfr, and can help you find the version on headsets you own.
- Meta OS version 68 or newer — use managexr.com/casting and a six-digit code. No cable needed.
- Older than version 68 — use casting.managexr.com and connect over USB first.
- Enrolled in Meta Horizon (MHMS) — see Cast a headset enrolled in Meta Horizon below.
Meta OS version 68 or newer
You’ll need: a Quest 2 or Quest 3S on Meta OS 68 or newer, and a computer on the same network with a browser open.
- In the headset, select the Screencasting icon from the Home Screen toolbar.
- The headset shows a six-digit code. It is generated fresh each time, so use the one on screen rather than one you noted earlier.
- On a nearby computer, go to managexr.com/casting.
- Enter the six-digit code from the headset.
Success looks like the headset’s view appearing in the browser window. You can now start the sim.
Note: managexr.com/casting redirects to
console.managexr.com/casting, so both addresses reach the same place. The shorter one is easier to type if you are working from a printout at a school or an event.
For step-by-step detail from ManageXR, see Casting a device with ManageXR.com/casting.
Older than Meta OS version 68
On older firmware you start the connection over a USB cable, then choose a wired or wireless cast.
You’ll need: a Quest 2 or Quest 3S, a computer running a Chromium browser (Chrome or Microsoft Edge), and a USB cable that can transmit data (not a charge-only cable).
- On your computer, open casting.managexr.com.
- Connect the headset to your computer with a USB cable.
- Click the blue Add button in the left navigation bar.
- Find your device in the pop-up and click Connect. (Not seeing your device? Make sure developer mode is enabled — it’s on by default for Transfr-leased headsets.)
- Click the blue Connect button in the left nav, and follow any prompts that appear.
- In the headset, select Allow on the “Allow USB Debugging” screen.
- Choose a casting option — wired or wireless.

Wired vs. wireless
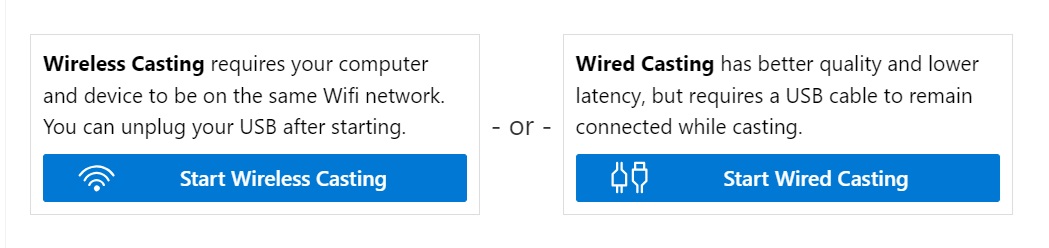
- Wired casting has better quality and lower latency, but the USB cable has to stay connected the whole time. It doesn’t use your network, so it works even on locked-down Wi-Fi.
- Wireless casting needs your computer and the headset on the same Wi-Fi network. It opens a new browser window, so allow pop-ups from the site. Once the cast starts, you can unplug the USB cable. Wireless casting is not available on the Pico Neo 3.
Cast a headset enrolled in Meta Horizon (MHMS)
Headsets registered through Meta Horizon Managed Services don’t need anyone to sign in to a Meta account to cast. Instead you cast to the browser using a dedicated organization casting link.
- In the headset, select the casting icon from the Home Screen toolbar.
- Select computer from the Available Devices list, then select Next.
- On a nearby computer, go to your organization’s casting link, which appears in the headset. It looks like
oculus.com/casting/{yourOrganizationIdentifier}. - Enter the six-digit code that appears in the headset.
For how enrollment itself works, see ManageXR’s Meta Quest enrollment guide.
Cast a Pico Neo 3
The Pico Neo 3 uses its own built-in Pico Casting tool. You can cast to a browser on a computer or to an Amazon Fire TV.
Cast to a browser
- Connect the Pico headset and your computer to the same Wi-Fi network. (Suggested browsers: Chrome or Edge.)
- From the Home screen navigation panel, hover over the sharing icon and select Screencasting.
- Select Use Pico Casting, then Cast to Browser.
- On your computer, open a browser and enter the screencast web address shown in the headset.
- On the “Welcome to Pico Screencast” page, select Start Screencast.
- Back in the headset, a “Screencast to External Devices?” message appears — select Allow.
To stop casting: from the Home screen navigation panel select Screencast, hover over Cast to Browser, and select the red End Screencast button.
Cast to an Amazon Fire TV
- Connect both the Fire TV Stick and the headset to the same Wi-Fi network. On a dual-band network, make sure both are on the same band (both 2.4 GHz or both 5 GHz).
- Press and hold the Home button on your Fire TV remote and select Mirroring. Leave the Mirroring screen open on the TV.
- In the headset, select Screencasting from the navigation menu.
- On the Pico Cast page, select the mirror icon in the top-right corner.
The first time you cast to a Fire TV, the headset will prompt you to turn off chromatic aberration correction and restart the headset. Adjust the setting as directed, restart, then repeat the steps above.
For PICO’s own instructions, see PICO: cast your screen to a TV, TV box, or laptop.
Does casting carry the audio?
Casting mirrors the picture, but sim audio doesn’t always follow it to the other screen:
- ManageXR browser casting (Quest) — no audio, on either the 68-or-newer or the older method. Only the picture is sent; sim audio stays in the headset.
- Meta Horizon (MHMS) casting — audio is sent to the browser along with the video.
- Pico Neo 3 casting — audio is sent to the browser along with the video.
If you need room audio and your method doesn’t carry it, connect a Bluetooth or wired speaker to the headset so the class can hear the sim.
If casting is blocked on your network
Many organizations block headset video from streaming to other devices. If casting fails even though everything is on the same network, your IT team needs to allow it.
Let your IT team know that Transfr Quest 2 headsets are locked-down Business devices that run only Transfr apps — there’s no YouTube, Netflix, game demos, or general internet access. Your network team can allow casting from the headset to the receiving computer.
Two alternatives if IT can’t open the network:
- Mobile hotspot — a secure Wi-Fi network without the same firewall restrictions (from a MiFi unit like Verizon’s Jetpack up to a Cradlepoint system). These need a data plan, and you should cast one headset at a time over a hotspot because the video stream is large.
- Dedicated Wi-Fi network — some IT teams set up a password-protected network with no firewall restrictions, reserved just for the headsets.
- Wired browser casting — on older Quest firmware, casting over a USB cable with the ManageXR wired option avoids the network entirely.
Troubleshooting a slow or glitchy cast
- The cast won’t start or the app can’t find your headset. Use a Chromium browser (Chrome or Microsoft Edge). Make sure developer mode (USB debugging) is enabled — it’s on by default for Transfr-leased headsets. Confirm your USB cable can transmit data and isn’t a charge-only cable.
- The six-digit code doesn’t work. A new code is generated each time you open Screencasting in the headset, so an older code will fail. Read the code off the headset as you enter it.
- Another program is interfering. Browser casting won’t work while other programs are talking to the headset. Close the ManageXR Device Setup Tool, SideQuest, Android File Transfer, Android Studio, and similar tools, then try again.
- The screen flickers black mid-stream. This usually means a system notification briefly interrupted the stream. It resumes on its own.
- The cast is laggy or the video is choppy. Wired casting has better quality and lower latency than wireless — switch to it if you can. Over a mobile hotspot, cast only one headset at a time, since the video stream is large.
Notes and caveats
- Casting quality and setup steps differ by headset — always confirm which device (Quest 2, Quest 3S, or Pico Neo 3) you’re working with, and which Meta OS version it is on, before following steps.
- Casting is for observing and demoing. It doesn’t affect what the learner sees or does in the headset, and pausing or closing the cast doesn’t pause the sim.
Related articles
- Quest 2 Quick Start & Hardware Guides
- Pico Neo 3 Headset Guide
- What does Transfr need on our network?
Still need help? Contact our support team.
Last updated: August 24, 2026
